Today, my long-awaited assistant arrived!
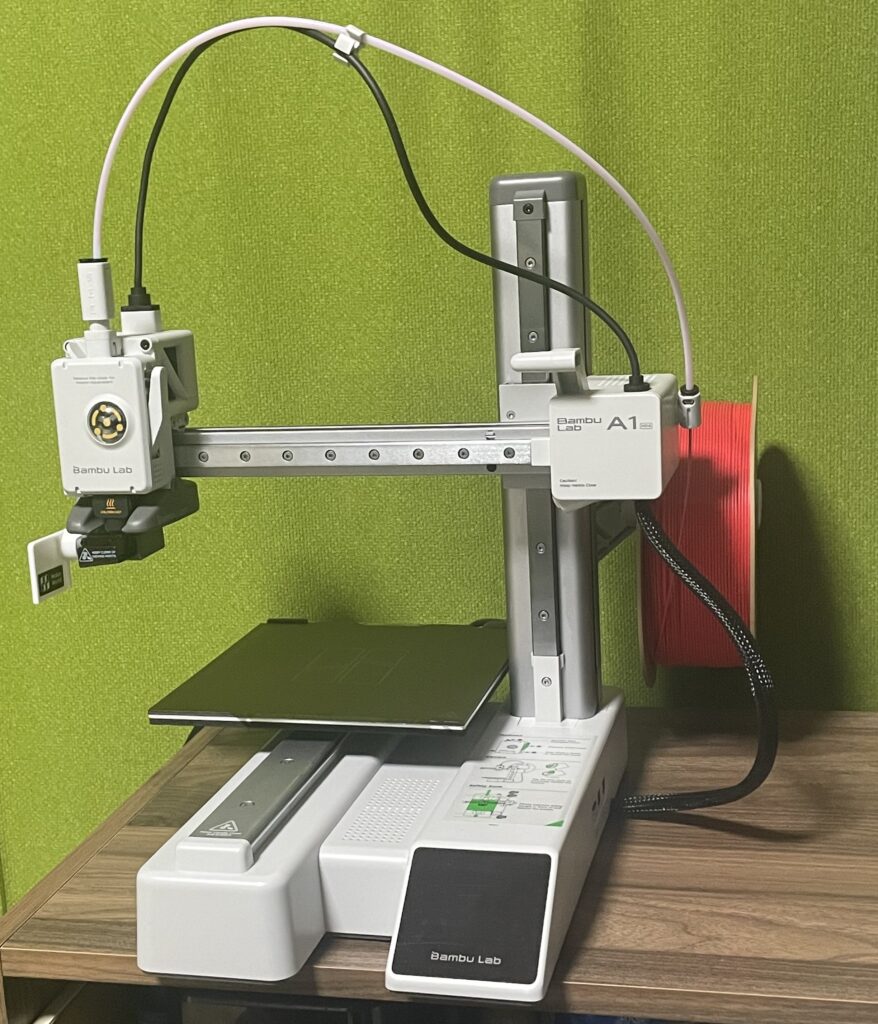
I thought they would cost over 500US$, but recently I found out that mini sizes up to 150mm square can be purchased for less than 200US$. That’s cheaper than the 2D printer I’m using now!
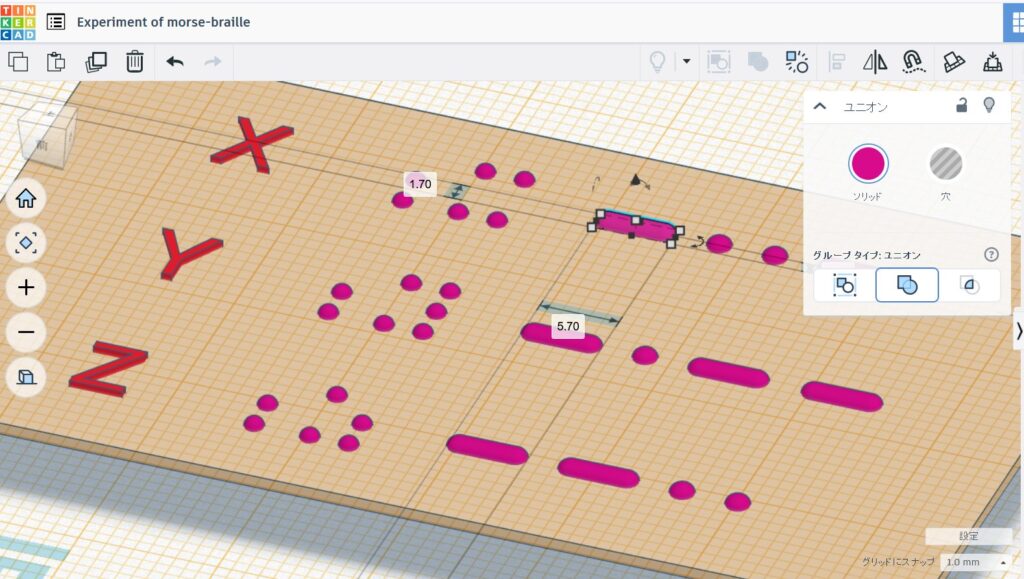
As soon as it arrived, I used TinkerCAD, a beginner’s 3D modeling tool (a simplified version of 3D-CAD), to try out a prototype of a “Braille Morse code table,” which until now had been a hybrid of a tape writer, Braille tape, and a Tepra tape maker, all of which involved sticking a lot of tape on things. As with anything, when you get a tool with a clear purpose, you tend to learn in a breakthrough fashion, and you end up mastering it so quickly that it even surprises you.
Now, this “assistant” is hard-working, but it’s not suitable for extremely cold environments as it can’t maintain the temperature of the counter surface (which gets to around 60°C). While he’s working, he’s constantly slurping down a string of “dried noodles” called filaments, and occasionally, excess waste from calibration 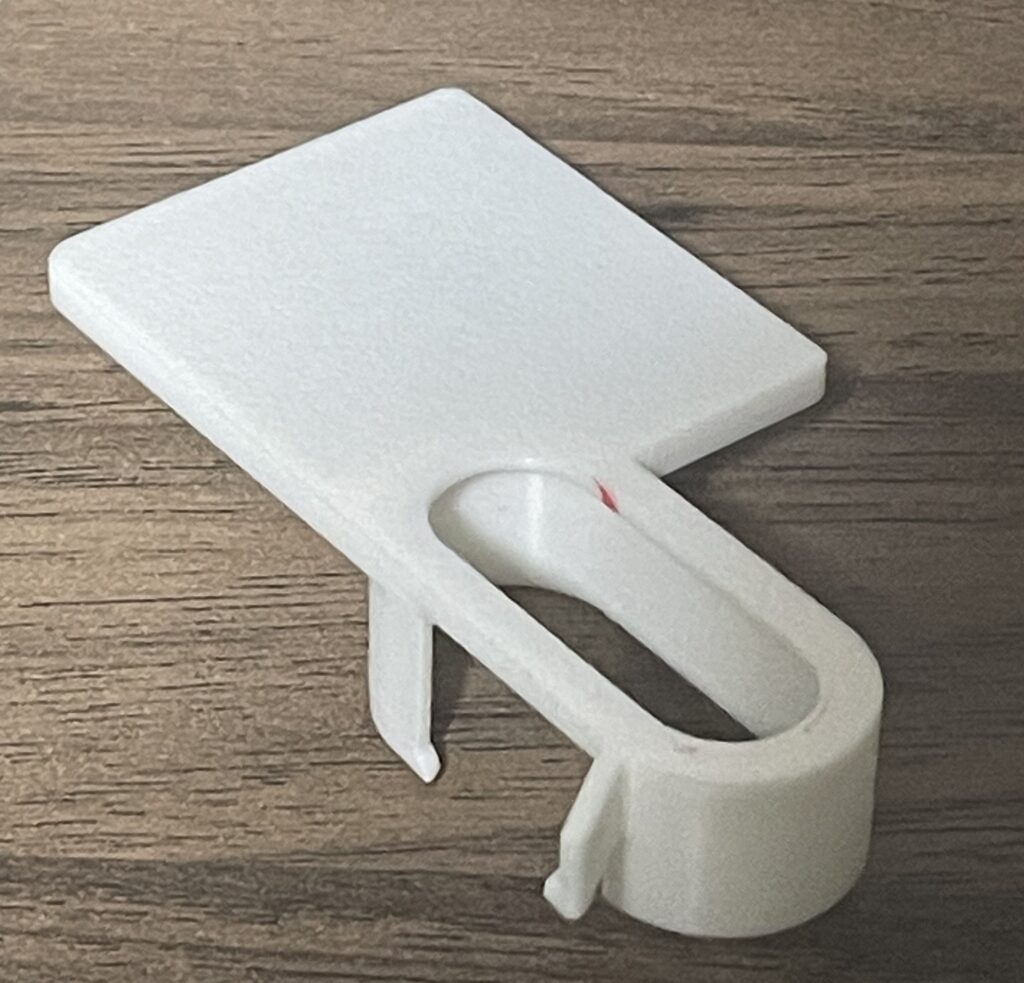 and other tasks will fly off to the side with force like goat droppings. Since I have to go and pick them up every time, I looked to see if they sell optional parts needed for this process, but…they don’t. That is,”If you’re a creator, you should be able to make something like that yourself.” He works silently, but I have to take care of the toilet. So, my first job was to 3D print a backboard to bounce the poop back!
The JIS Braille standard is set out in JIS T0921. According to this, the distance between dots is 2.0 to 2.8 mm, the diameter of the dots is 1.0 to 1.7 mm, and the height is 0.3 to 0.7 mm, so we decided to make it in accordance with this standard.
The set comes with a 0.4mm nozzle. A YouTube video showed that this standard diameter nozzle does not have enough resolution to read characters the size of Braille. However, if the diameter of a single Braille dot is 1.7mm, then it is four times the diameter of the nozzle. To put it in perspective, it’s like using the nozzle of a mayonnaise pipe to draw a hemisphere the size of a golf ball… so I thought it should be possible to draw something like that, so I gave it a try.
For Morse code, I made the dots the same diameter as Braille, 1.7mm, and the spaces a little wider, at 2.3mm. This means that each dot, including the space, is 4.0mm long. A dash is three times longer than a dot, but I made it slightly longer at 5.7mm, adding a 2.3mm space, so the code for a dash is 8.0mm long, so I drew it that way.
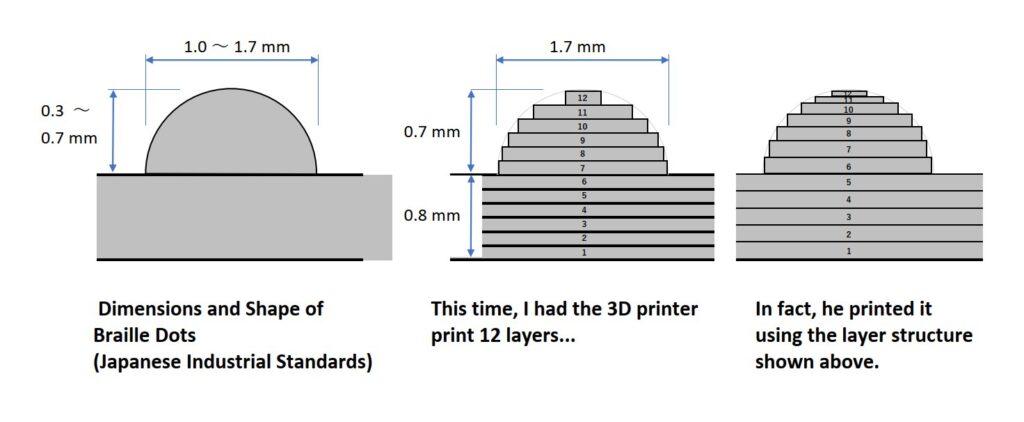 This 3D CAD system depicts this as a “jagged dome.” As he sips the dried noodle, he melts it to a temperature of around 250°C and stacks them layer by layer. It’s painstaking work, but he does it with great precision.
At first glance, the completed “Braille Morse Code Table” looks very good. However, it hurts when I trace it with my finger… The viscous filament is released and then stopped, so it seems to have quite a lot of stringy threads and is quite spiky. Even before I can even consider whether the Braille can be recognized, scanning it with my fingertip is painful and makes my fingers rough.
Unfortunately, it doesn’t seem to be very practical as it is. Perhaps it would be better to use a 0.2mm nozzle, which is one size smaller than the current one, so that I could draw more detailed hemispheres?
With this in mind, I applied some #1000 grit sandpaper to the surface, and to my surprise! It immediately became good enough to read by finger.
I guess “manufacturing” really does require a final process of being checked and finished by human hands. (2025.12.8)